Project Dashboards
Location: Navigate to Project View and select Dashboard
| 1 |
Every Project has a Dashboard # |
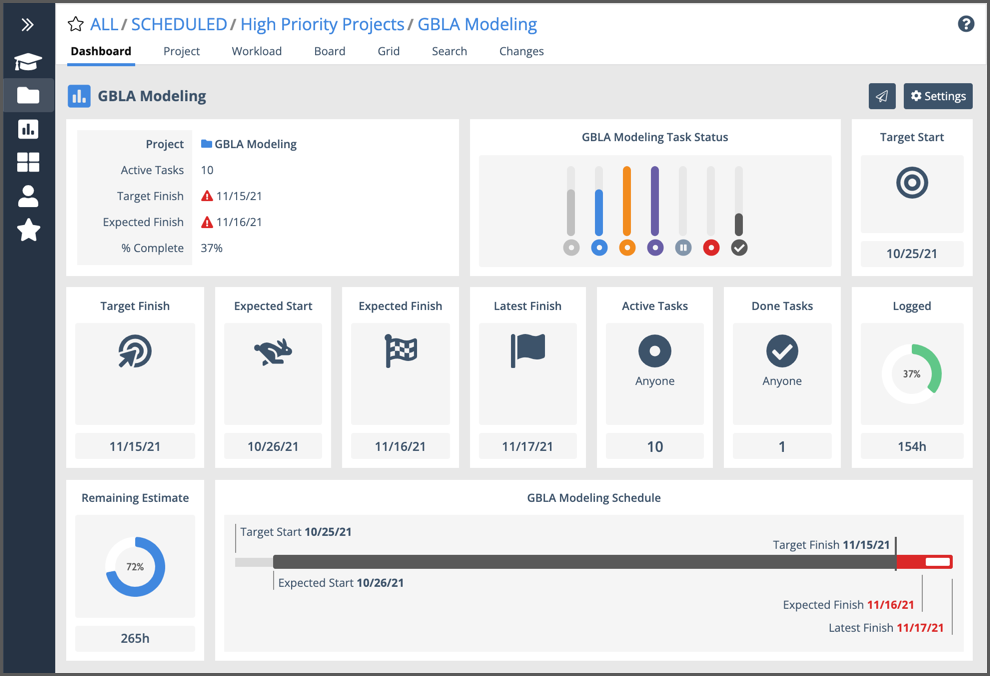
Use Dashboards to visualize work and mine scheduling insights as you manage projects through to the end. Dashboards update in real time as people log progress, update estimates and mark work done. There are three types of Dashboards in LiquidPlanner:
Project Dashboards capture data from a single project
Package Dashboards bring data together across all projects within a package.
Workspace Dashboards incorporate data from all projects and packages.
Dashboards are easy to set up and customize to suit your needs. Once the Dashboard is created, it’s also added to the Dashboard library (more on that down below). Everyone who accesses a dashboard sees the same information. Dashboards do not have guest access or external sharing at this time.
This lesson covers Project Dashboards which are available on all plans. Every Project has a Dashboard, and they can be created in any Collection: SCHEDULED, PENDING, ARCHIVED and TEMPLATES.
Package and Workspace Dashboards are available in the PROFESSIONAL and ULTIMATE plans. Learn about them in the Package Dashboards and Workspace Dashboards lessons.
Navigate to the Project Dashboard
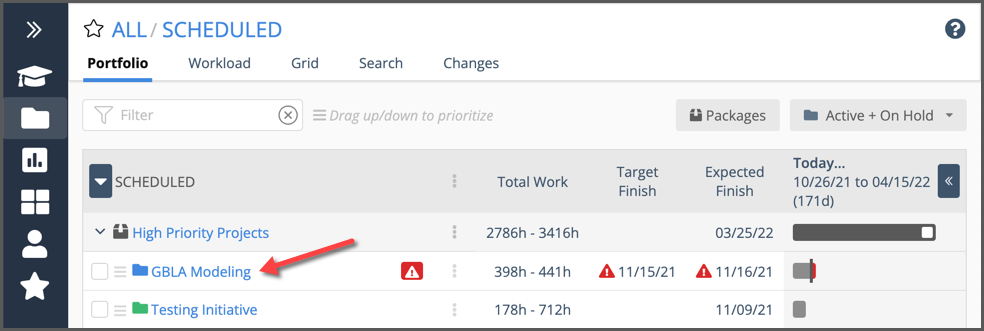
To access a Project Dashboard you need to go into the Project View. Start on either the Portfolio view (as shown above) or in a Package and navigate into Project View by clicking on the project name.
Project View
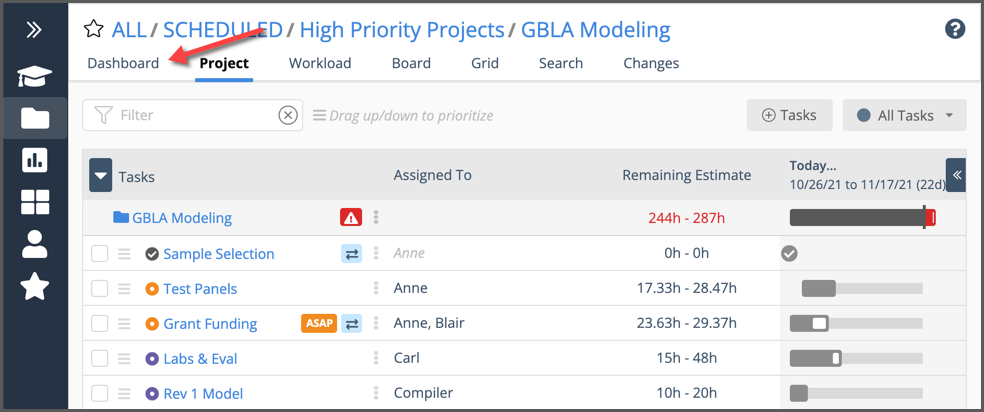
After landing in the Project View, select Dashboard in the view menu above the project task list.
Favorite and Share the Dashboard
A Project Dashboard springs to life the first time someone goes into the view. LiquidPlanner provides a default set of widgets from that first click, with no extra steps required on your part. Once the Dashboard is created, everyone with access to the Project sees the same widgets and data.
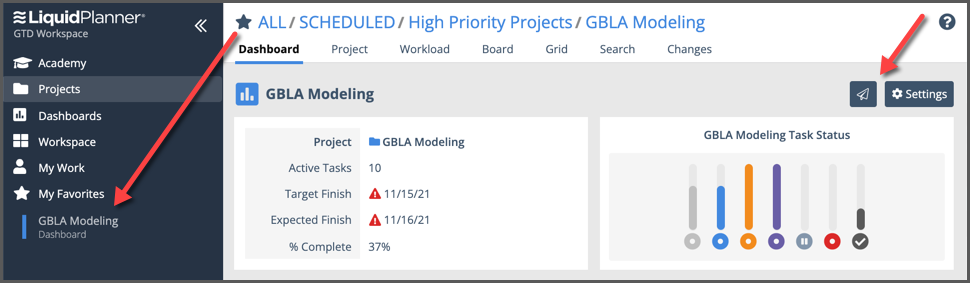
Click the star in the bread crumb to Favorite the dashboard for easy access from the left navigation bar.
Use the Copy Link button (next to Settings) to share a link to the Project Dashboard with workspace members who have access to the project. They can use the link to get back to the dashboard from anywhere inside or outside the workspace.
Dashboards are interactive and they update in real time. Clicking on a widget will show more information so you can see what’s driving the data.
Creating a Project Dashboard automatically adds it to the Dashboard Library. Once it’s in the library anyone with access to the project will see it listed there.
| 2 |
Edit Dashboard settings and layout # |

Members with Project Manager access and higher on the project can customize the Project Dashboard. Use the Settings button to activate Design Mode and edit dashboard settings.
Design Mode
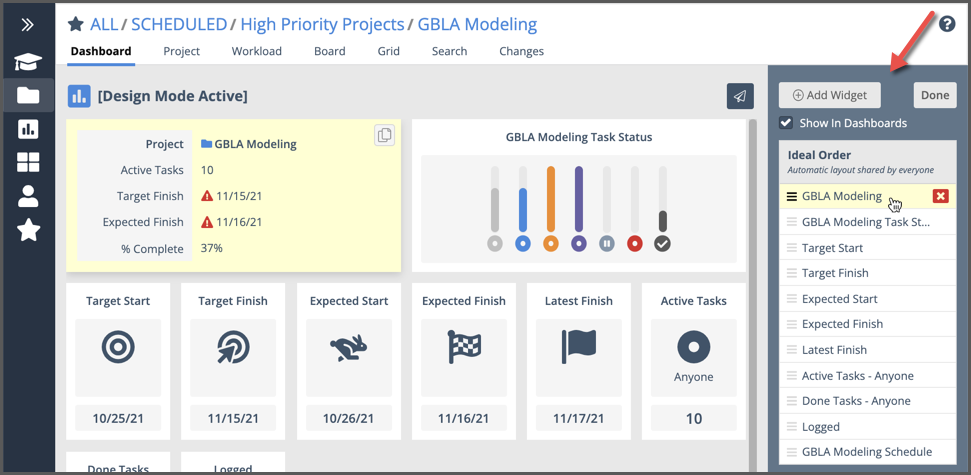
In Design Mode, use the settings bar on the right to change the layout, add, or remove widgets .
+ Add Widget opens the widget gallery. Widgets are organized into categories: Schedule Dates, Schedule Bar, Metrics, Task Board, Lists and Properties.
Show In Dashboards checkbox controls whether or not it appears in the Dashboards Library. The box is checked by default. People with Project Manager access and above on the project can uncheck this box to hide it from the Dashboards Library.
Adjust the Ideal Order by dragging widgets up or down the list. Use the red X to remove a widget. Selecting a widget in the list highlights it in yellow on the list and in the Dashboard.
Click Done to save changes and exit Design Mode.
Widget Gallery
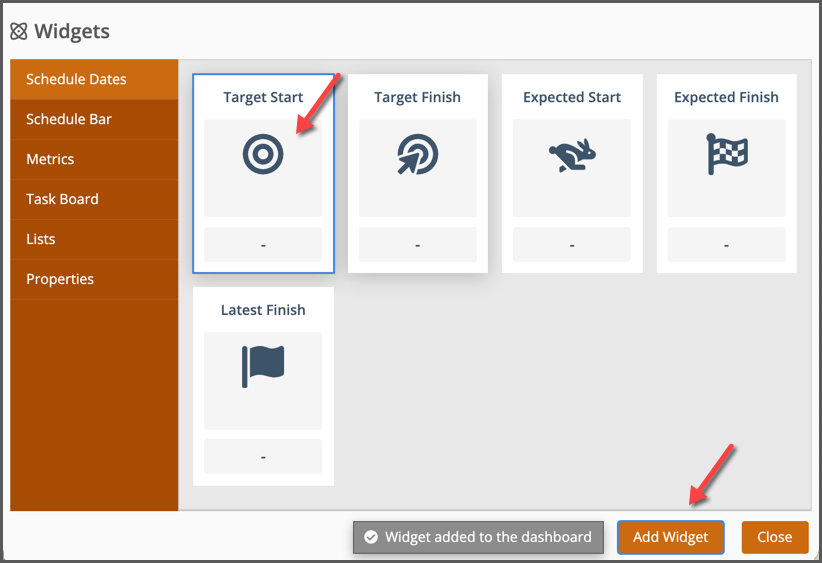
Use +Add Widget in the Settings bar to open the Widget Gallery. Select a category on the left and then choose the widgets you want to add from each category. A confirmation message appears as each widget is added. Close the window when you are finished adding widgets.
New widgets land at the top of the Ideal Order list on the Settings bar. Drag them to another position in the list to change the dashboard layout.
Lists Widgets

Use the Lists widget to customize a Task table that is accessed when a user clicks on the widget in the Project Dashboard.
Organizations on the PROFESSIONAL and ULTIMATE Plans can include Task Custom Data as a custom filtering option within the Task Filter and as a Table Column when customizing Lists widgets.
Properties Widgets
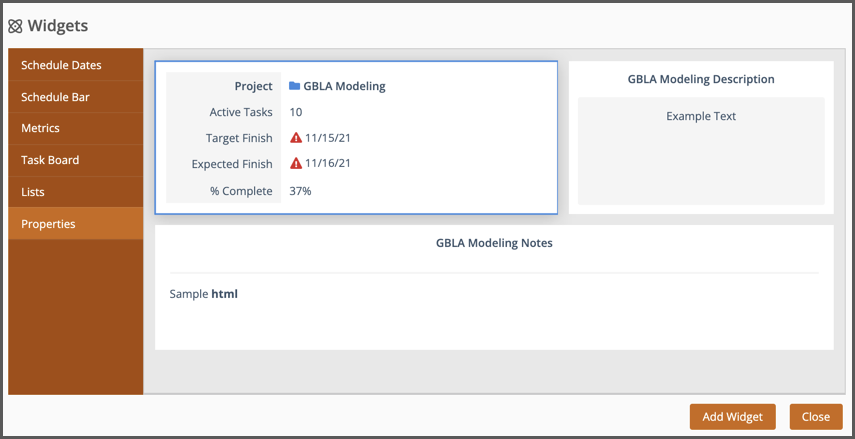
Properties widgets include Project Summary, Project Description, and Project Notes.
Organizations on the PROFESSIONAL and ULTIMATE plans will also see Properties widgets for Custom Data fields associated with Projects. The following field types can be presented as Properties widgets: Date, Currency, Numeric, Text (single), User (single), Picklist (single), Note, Multi-Line Text, Description, Checkbox.
| 3 |
Edit Widget settings and filters # |
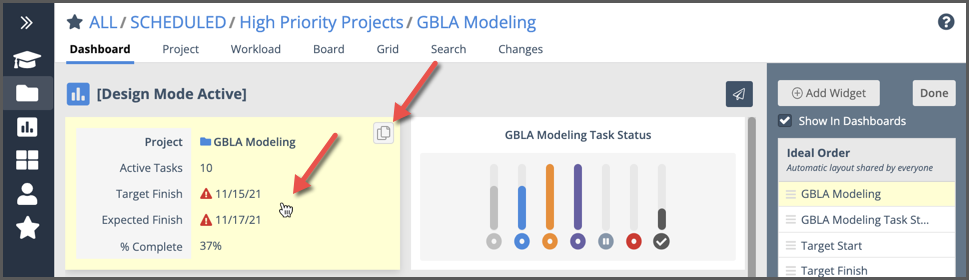
While Design Mode is Active you can edit widget settings and filters by clicking on a widget to open the Widget Editor. Use the copy button in the upper right corner of a widget to duplicate it without opening the Widget Editor.
Widget Editor
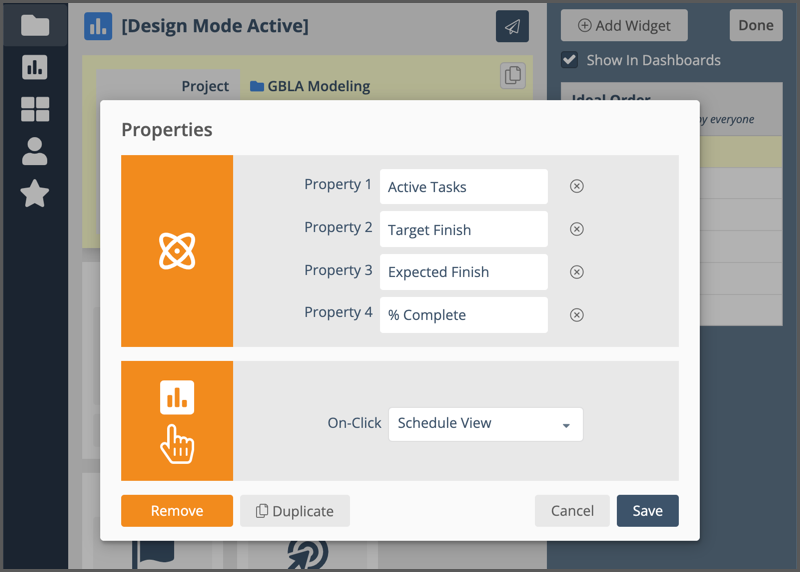
A widget editor has three sections:
Settings to establish which data the widget will display on the dashboard.
On-Click action to set where users will go if they click on the widget, and what will display in that location.
Actions: Remove the widget from the Dashboard, Duplicate it, Cancel, or Save.
Organizations on the PROFESSIONAL and ULTIMATE Plans are able to use Custom Data for settings and filters while working in the widget editor.
| 4 |
Dashboards Library # |
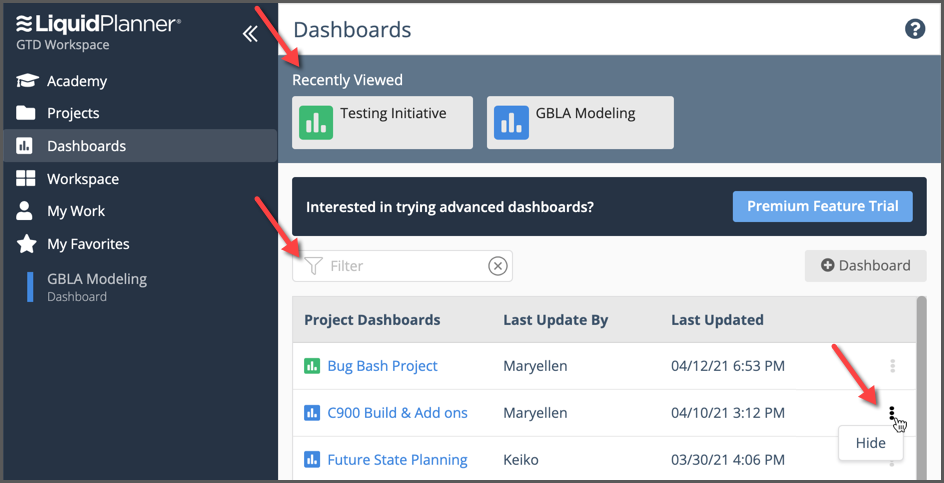
Navigate to the library by clicking on Dashboards in the left-navigation. Viewing dashboards is access based. If you don’t have access to the work, you won’t see the dashboard in the library.
Recently Viewed at the top of the page displays the last five dashboards you accessed.
Use the Quick Filter to search for a Dashboard by name.
+Dashboards creates a Workspace Dashboard.
Columns show when a dashboard was last updated and by whom.
Use the 3-Dot menu to Hide a dashboard (requires Project Manager access or higher on the Package).
Open a dashboard by clicking on the dashboard name.
The Dashboard Library has all the dashboards in your workspace that have the Show in Dashboards box checked in their Settings. If that box is checked on a TEMPLATE, then the dashboard will be added to the library when a project is created from the template.
Dashboards are listed by type: Workspace, Package, Project. Workspace and Package Dashboards are available in PROFESSIONAL and ULTIMATE Plans.
Deleting a Project removes its Dashboard from the Dashboard Library.


