Templates Collection
Location: Collections. Start on Projects in the left-side navigation, then click All in the navigation breadcrumb at the top of the page
| 1 |
Navigate to the SCHEDULED Portfolio, then jump to Project Collections # |

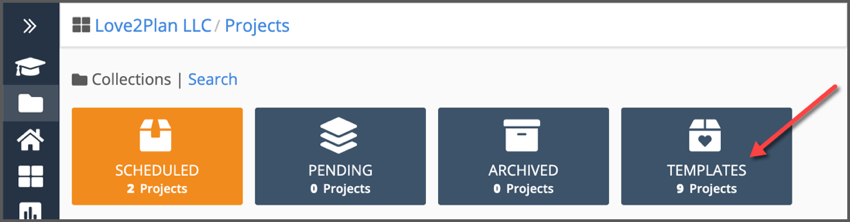
When you’re in the SCHEDULED Portfolio, you can access the Templates Collection by clicking ALL in the navigation breadcrumb at the top of the page. If you’re in any other part of the workspace, go to the SCHEDULED Portfolio first by clicking Projects in the left-side navigation.
Templates Collection
The Templates Collection is where you create and manage project templates. This lesson covers everything you need to know about working in the Templates Collection.
The Academy Lesson, Create a Project from a Template is where you’ll learn how to add a templated project to the SCHEDULED, PENDING, or ARCHIVED Collections.
Sample Templates
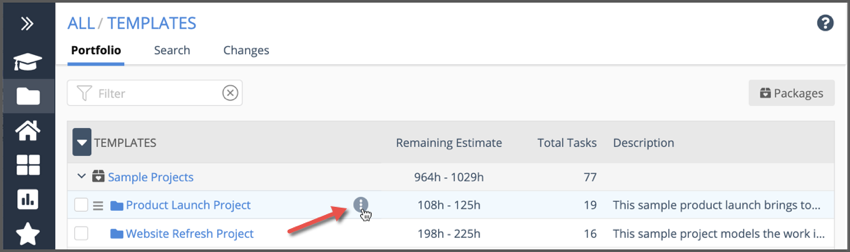
The Templates Collection contains 9 sample project templates you can use to get started. Right-click or use the 3-dot menu to edit or delete any of the template items, including Packages, Projects, Sub-folders, and Tasks.
| 2 |
Create your own Project Template # |
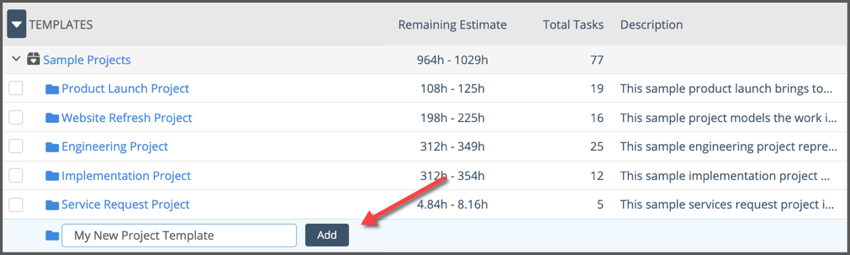
Start by creating a project folder in the Templates Collection. Enter the project name into the Add Project field and click the Add button. After creating the Project folder, you can set Planning and Properties fields on the Project Edit Panel. Right-click on the project name or use the 3-dot menu to open the Project Edit Panel.
Project Edit Panel
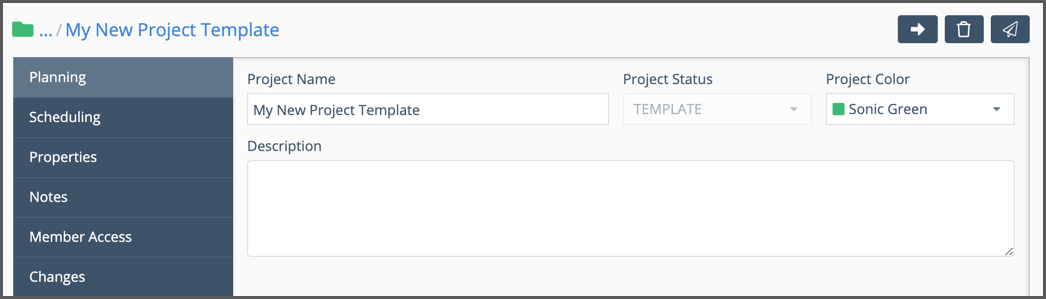
Anything you set on the Project Edit Panel will carry over when the template is added to your plan.
Planning: select a color for the project folder and enter the project description.
Properties: apply custom Data Fields. Custom Data Fields are available on the PROFESSIONAL and ULTIMATE PLANS.
Notes: enter project instructions or other information using rich text, images, and links.
Scheduling and Member Access tabs are disabled in the Templates Collection. They’ll activate once the template is added to your plan so you can set Target dates and dependencies. This is covered in Create a Project from a Template.
The Changes tab records the last 30 days of changes to the template (these aren’t carried over when the template is added in another collection).
| 3 |
Add Tasks to your template # |
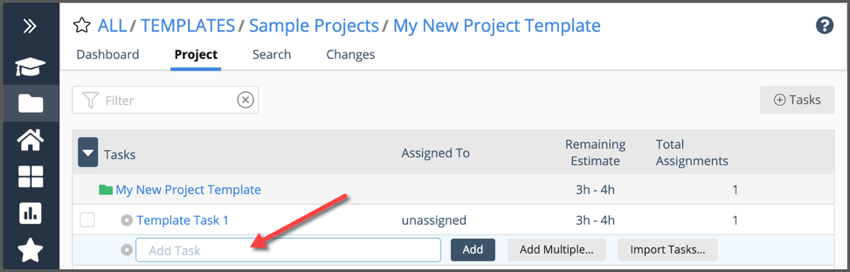
Click on the project name and jump into the template’s project view to add or import tasks. Clicking into the Add Task field reveals the Add Multiple and Import Tasks buttons. Enter a task name and use the Add button to create a single task.
Task Edit Panel
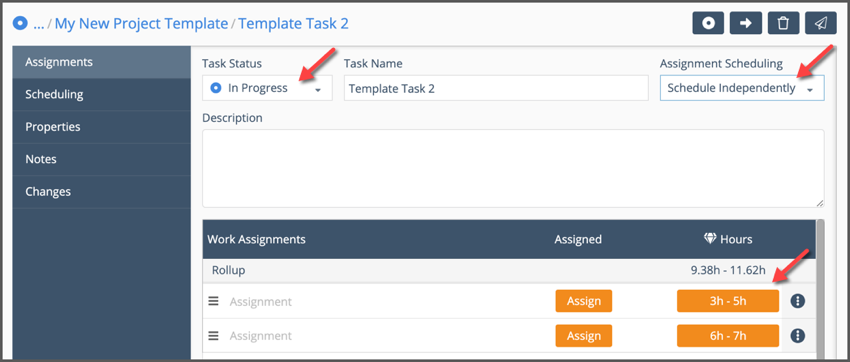
Click on a task name to open the Task Edit Panel. Anything you set on the Task Edit Panel will carry over when the Template Project is added to your plan.
Assignments: Set the Task Status, Assignment Scheduling Order and Description on this tab. Add and estimate assignments. Assigning the work in a template is optional. Here’s what you can expect:
If you know who will do the work, assigning that person in the Template, saves you a step when you set up the project later in the SCHEDULED Collection. These assignments won’t be a distraction for team members because template assignments don’t show up in Dashboards, My Work or Member views until after the project is added to the SCHEDULED Collection.
Using Placeholders or Resources to represent teams or skill types is an option for Template assignments. Use names like Engineering_tbd, Design_tbd to represent people who will be assigned later.
Templates can be unassigned by leaving the field blank, or choose None from the drop down.
Tasks assigned to a Placeholder, Resource or unassigned in the Template need to be edited after the project is made. Create a Project from a Template covers editing assignments.
Properties: apply custom Data Fields. Custom Data Fields are available on the PROFESSIONAL and ULTIMATE PLANS..
Notes: enter task instructions or other information using rich text, images, and links.
The Scheduling tab is disabled in the Templates Collection. It activates once the template is added to your plan so you can set Target dates and dependencies. This is covered in the lesson, Create a Project from a Template.
The Changes tab records the last 30 days of changes (these aren’t carried over when the template is added in another collection).
| 4 |
Import Tasks into your template # |

Importing tasks is a quick way to get up to 100 tasks into your project template. Importing tasks into a template is slightly different than importing into the SCHEDULED Collection. Because templates are used for planning and set up, they are not scheduled. This means that some of the columns in the LiquidPlanner Excel Template are ignored when importing into a template.
You can leave these columns blank when setting up the Excel file for a template: Done Date, Target Start, Target Finish, ASAP Priority Override, Assignment Scheduling.
When the 1st Assignment field is blank the task will be “unassigned” in the template after import.
Assignment Scheduling can be updated on the task edit panel after importing. Set the other fields after the template is duplicated in the project plan. Learn how in the Academy Lesson, Using Project Templates.
The lesson Import Tasks from Excel has everything you need to know about importing tasks.
| 5 |
Project Dashboard templates # |
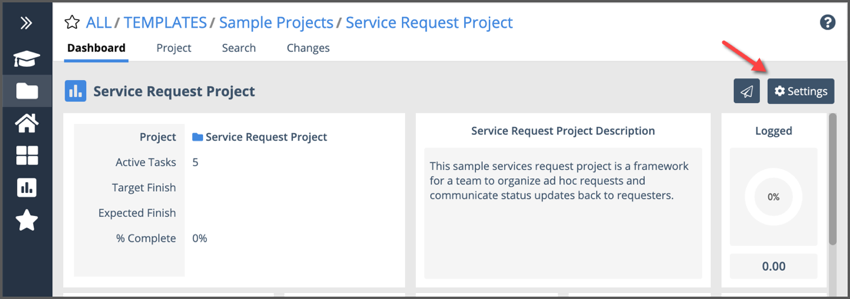
Template Projects have customizable dashboards. Changes you make in the template project dashboard will carry over when the template is added to the project plan. Click on Settings to enter design mode and access the dashboard widget library.
Some widgets in the template dashboard are blank because scheduling, logging progress, and date settings are disabled within the Templates Collection. They’ll activate once the template is added to the SCHEDULED Collection and update in real time when the project is in motion.
| 6 |
Use Packages to organize templates # |
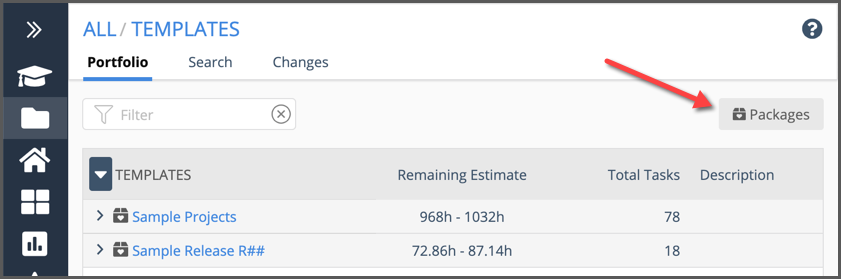
Use Packages to organize project templates. Two Sample Packages are provided with your account. You can add new project templates to these packages, or create packages of your own.
Click on the Packages button to create a new Package.
Package Modal
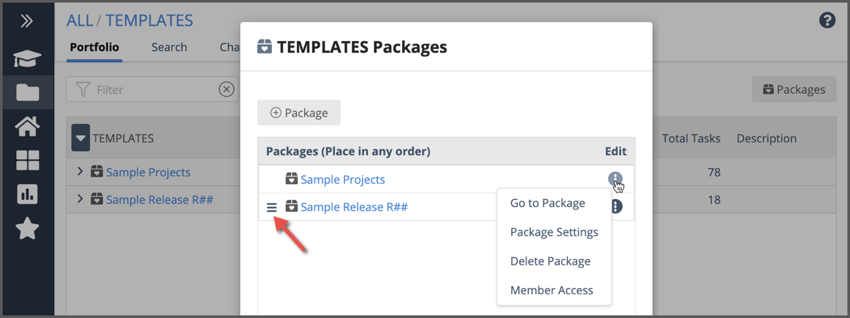
This modal is for creating and managing Packages. Create a package with the +Package button. Change package order in the Template Portfolio by dragging them up or down the list with the drag bars on the left of the package. Use the 3-dot menu to edit a package.
Go to Package: takes you to the package view, which focuses on projects within the package.
Package Settings: opens the package edit panel.
Delete Package: deleted items are retained up to 30 days. Recover deleted items by going to the Changes view and selecting the Deleted Items sub-view.
Member Access: adjust member settings for viewing and interacting with items in the package.
| 7 |
Move & Bulk Edit template items # |
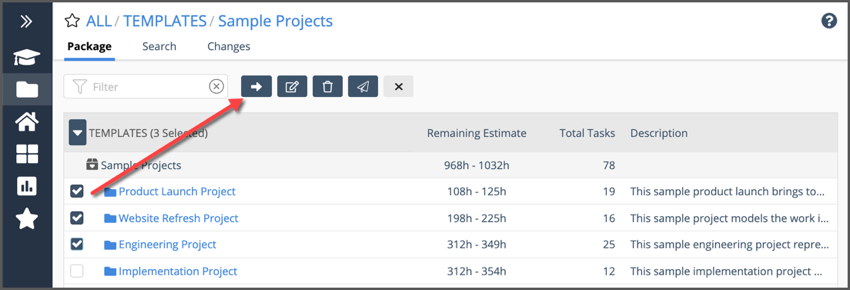
When creating a Project Template, you may find it helpful to use the Bulk Editor to move or edit multiple plan items at once. Use the checkboxes on the left to engage the editor as shown above. See the Bulk Edit & Move lesson to learn about everything available for editing Projects and Tasks.
Template items can only be moved within the Template Collection. When you’re ready to use a template in another collection, follow instructions in the lesson, Create a Project from a Template.


