Workspace Dashboards | Premium Feature
Location: Dashboards in the left-side navigation
| 1 |
Package and Project insights across the Portfolio # |
Workspace Dashboards allow you to incorporate data from all projects and packages in the workspace. They offer advanced filtering so you can zero in on Collections, Packages, Projects, Tasks, and Custom Data. Workspace Dashboards are a Premium Feature in PROFESSIONAL and ULTIMATE Plans.
If you have completed the Project Dashboards and Package Dashboards lessons then you know just about everything there is to learn about working with dashboards and you’re ready to apply that knowledge to your Workspace Dashboards.
This lesson includes some dashboard basics, but it mostly covers nuances that are specific to Workspace Dashboards. Go back to other lessons if you feel that you need to fill in some gaps.
| 2 |
Create Workspace Dashboards in the Dashboard Library # |
Workspace Dashboards are created in the Dashboard Library. Access the library by going to Dashboards in the left-side navigation. Members with Project Manager access or higher at the workspace level can create Workspace Dashboards. Use +Dashboard to get started.
Create the Dashboard
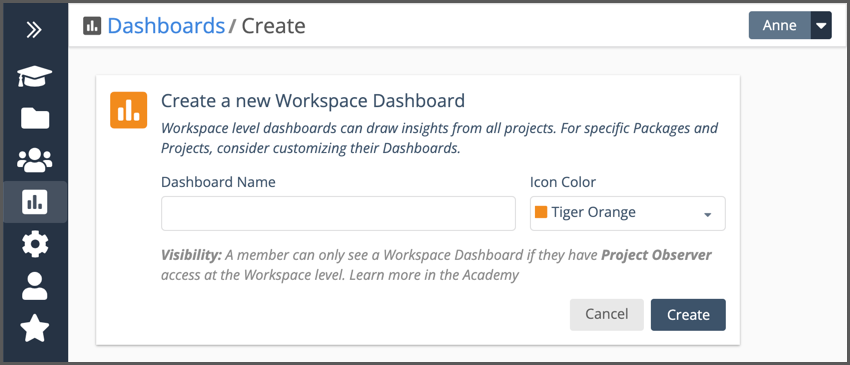
Enter a name for your Dashboard, select a color and create the Dashboard.
Anyone with Project Observer access or higher in the workspace will be able to see your Workspace Dashboard. To prevent people from seeing Workspace Dashboards you can implement Access Controls and set member access by Package or Project instead of at the workspace level. The last section of this lesson explains how to do that.
Access Controls are available in the ULTIMATE Plan.
| 3 |
Workspace Dashboard Default Settings # |
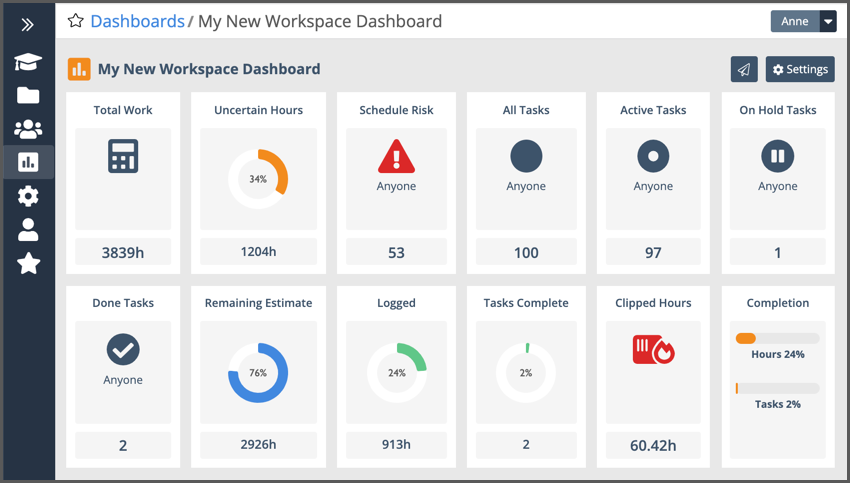
The Workspace Dashboard starts out with 12 Metrics Widgets. Each of the widgets has these filter settings:
Location: SCHEDULED Collection
Project Filter: Active + On Hold
Task Filter: All Tasks
Assigned: Anyone (includes all Members, Resources and Placeholders)
Go into Design Mode to change the widget filters. Use the Settings button to activate Design Mode.
| 4 |
Design Mode # |
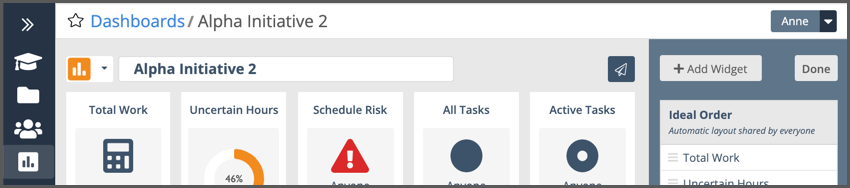
With Design Mode activated you can . . .
Change the color associated with the dashboard using the drop down menu to the left of the dashboard name.
Click into the name field to edit the dashboard name.
Use the Settings bar on the right to add widgets and change the widget order.
To delete a Workspace Dashboard use the Delete Dashboard button at the bottom of the Ideal Order list (button not shown in this image).
| 5 |
Workspace Dashboard Widget Gallery # |
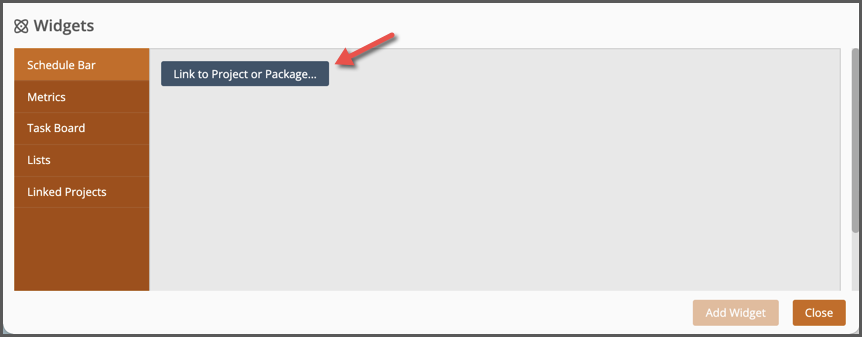
Use +Add Widget in the Settings bar to open the Widget Gallery. Workspace Dashboards do not have Schedule Date or Properties widgets.
“Link to Project or Package. . .” is the first step in setting up Schedule Bar, Task Board and Linked Projects widgets. Click on the button to open the filter and choose a Collection, Package or Project. As soon as you create the link, widgets that you can use with that plan item will populate the window. See more about linking below.
Link to Package or Project
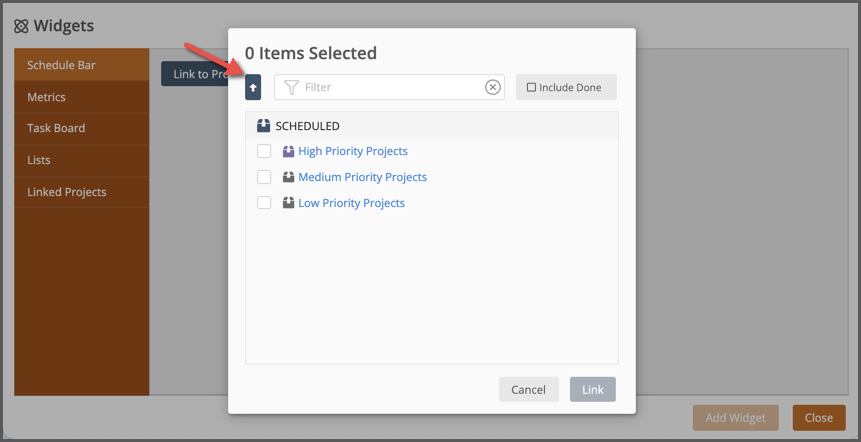
In the linking modal:
Use the up arrow to select a Package or Project in another Collection.
Click on a Package name to access its Project list.
Use the checkbox next to an item to make your selection.
Use the Quick Filter to search for items by name. Check the box to Include Done items.
Widget Filters
Widgets can be filtered after they’re added to the dashboard. Click a widget to open the filter while you’re still in Design Mode. Filter options vary by widget type.
Location: Workspace, Collection, Package, or Project.
Project Filter: Project Status, Schedule Risk, or create a Custom Filter to include Custom Data.
Task Filter: set the task status filter by group, Active, On Hold, Done or by Custom Task Status (e.g. To Do, Review, Waiting, etc.).
Assigned: select a Member, Resource, Placeholder or Group.
| 5 |
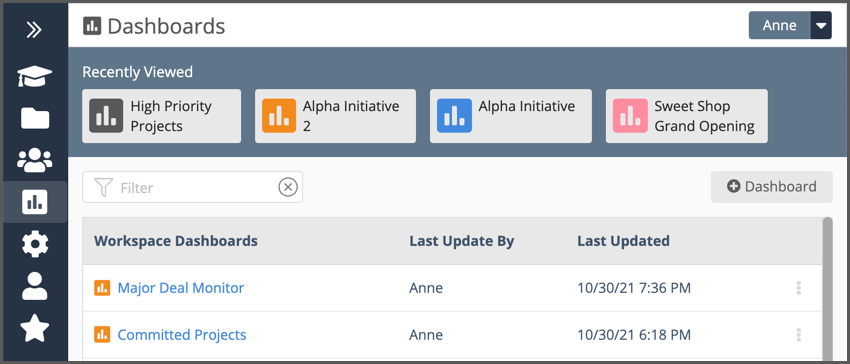
Dashboards Library # |
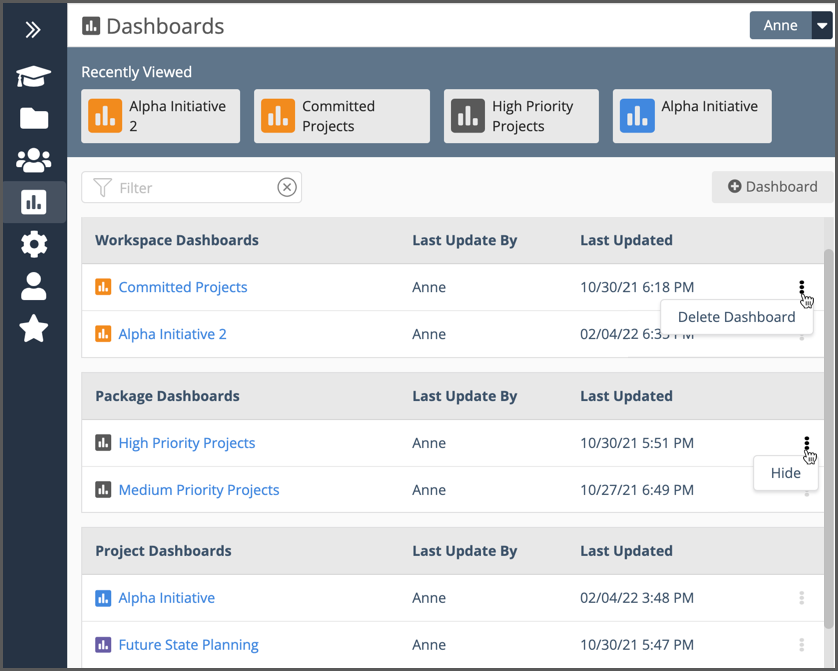
Navigate to the library by clicking on Dashboards in the left-navigation.
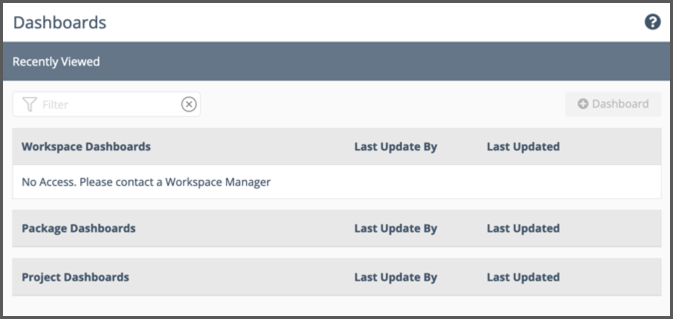
Recently Viewed at the top of the page displays the last five dashboards you accessed.
Use the Quick Filter to search for a Dashboard by name.
+Dashboards creates a Workspace Dashboard.
Columns show when a dashboard was last updated and by whom.
Use the 3-Dot menu to Hide Project and Package dashboards or to Delete a Workspace dashboard (requires Project Manager access or higher).
Open a dashboard by clicking on the dashboard name.
Anyone with Project Observer access or higher in the workspace will see Workspace Dashboards in the library. To prevent people from seeing them you can set member access by Package or Project instead of at the workspace level. Access Controls are covered in the next section.
| 6 |
Access Controls # |
It’s a two step process to implement Access Controls. In the first step, you’ll remove workspace access for all members, and in the second step you’ll set their access by Package or Project. Don’t miss the second step or the next time people log in they won’t see anything in the workspace!
STEP ONE: Remove Basic Access for All Members
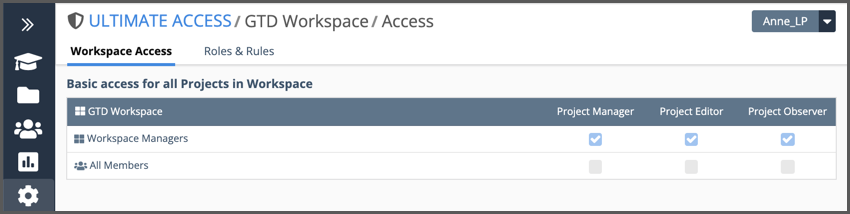
Use Administration in the left-side navigation and select Workspace Access in the Administration hub.
In the Basic Access section at the top of the Workspace Access page, clear the checkboxes for All Members (as in the image above). This will remove Package and Project access for anyone who is not a Workspace Manager. They will lose access to assigned work and they will no longer see Workspace Dashboards (see image below).
STEP TWO: Set Package and Project Access by Member
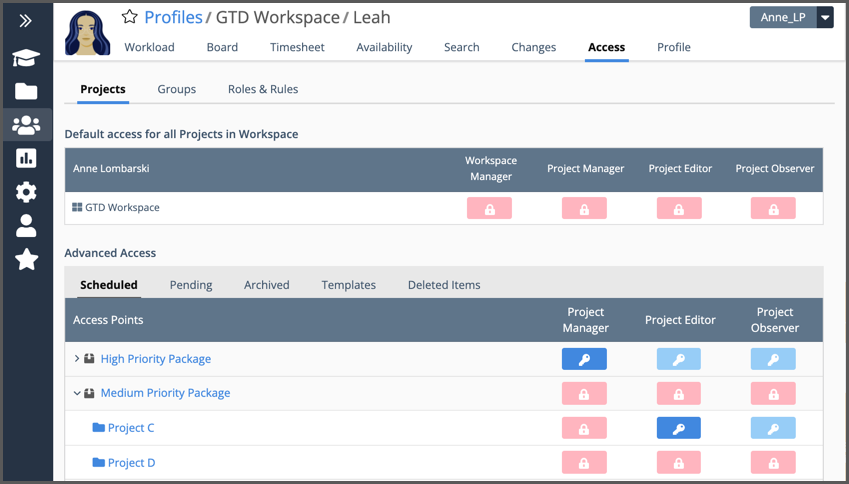
Navigate to People in the left-side navigation, choose a Member and go to their Access Page (shown above). In the Advanced Access section, set Package and Project Access for each Collection.
Access set for a Package is inherited by all the Projects in the Package. In the example above, Leah now has Project Manager access for all the projects in the High Priority Package.
She hasn’t been granted access on the Medium Priority Package, but she was given Project Editor access on Project C and that is the only Project she will see in that package.
Based on this example, Leah will not see any Workspace Dashboards. She will be able to access the High Priority Package and its dashboard, as well as dashboards for all the Projects in that Package. She’ll have access to Project C and its dashboard, but she will not have access to the Medium Priority Package Dashboard.
When Leah goes to the Dashboard Library in her workspace she’ll only see Dashboards she can access.
Access Color Key
- Pink indicates “no access.”
- Dark blue indicates explicit access.
- Light blue represents implicit access, inherited from a higher access level.


